Break the Fake: Make Your Own Custom Search Engine
To make a custom search engine you will need to be logged in to a Google account. (If you don’t already have one, go to accounts.google.com to sign up.) You don’t have to be logged in to Google to use it. As well, anyone can use a custom search engine once it’s been created, so a whole class can use search engines made with a single account.
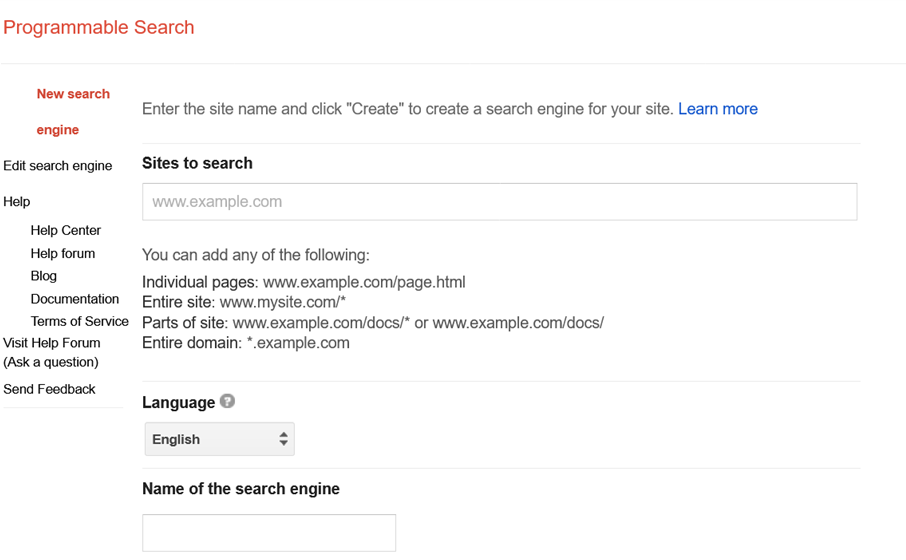
Once you’ve logged in, go to cse.google.com, then scroll down to the bottom of the page and click Get Started. Now you’ll see this:

To make your Custom Search Engine:
- Give your search engine a name in the box labeled Name of the Search Engine. This name is just to help you remember it, so you can call it anything you like: Newspapers, Sports news, Video game sites, and so on.
- Under Sites to Search, sites you want to include. Make sure to put in the web address (like mediasmarts.ca) instead of the name of the site.
- As soon as you add one site, another box will appear below for you to add another.
- When you’ve added as many sites as you want, scroll down to click I’m Not a Robot and then click Create.
- You can always go back and add more sites to your search engine, so don’t worry about getting them all right now.
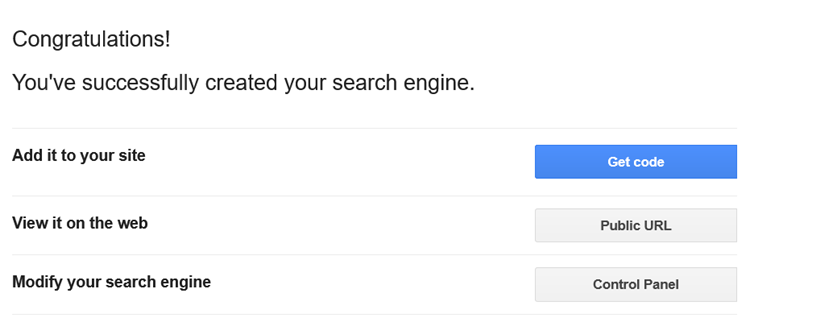
Now you’ll see this:

Click on Public URL to get the web address for your new search engine. These addresses are pretty long, so you may want to bookmark it (see bit.ly/browserbookmark to see how to do this) or copy it into a link shortener like bit.ly or tinyurl.com.
Editing and Making More Custom Search Engines
The next time you go to cse.google.com, you’ll see a list of your custom search engines.
If you want to make a new one, click on Add. Then follow the same steps as you did for the first one..
If you want to delete a search engine you’ve made, select the box next to its name and click or tap Delete.
If you want to change one you’ve already made, click or tap on the name. This also lets you do things like turn on Safe Search and allow or forbid Image Search in your custom search engine.
